Furia EC020 Accelerator Card for Amiga 600
Background
Hello Amiga lovers! The purpose of this page is to give you my account and experiences, as well as providing some helpful tips to other users, of the Furia EC020 accelerator card for the Amiga 600. Hopefully, I can help other Furia users out there with the issues I encounter.
So, let us begin. My Amiga 600 is running ROM3.1, Kickstart 40.63, with Workbench 40.42 with a Furia Card, Firmware 13.0_4k_50ns.
Installation of the Furia
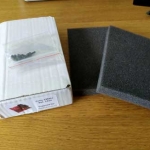
I purchased the 33MHz with passive cooling Furia card model from AmigaStore.eu. The card arrived in a white generic cardboard box with thick sponge padding to protect it during transport. Also included in the box are four mounting screws (weren’t used in the end), to secure the card to the motherboard and that is it; no documentation, no set up instructions or manual.
You can order the Furiatune driver on a Floppy Disk as an optional extra at the time of purchase (in hindsight I wish I did, so I highly recommend you do!), but, I feel as I am spending near £100 on a piece of hardware, surely a free floppy disk with the driver would had been a nice addition.
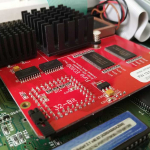
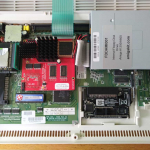
The installation process of the card was relatively easy. The Furia card is a daughter board that fits directly on top of the main Motorola 68000 CPU chip of the Amiga 600. This is where the Set Up documentation would had come in handy because if you didn’t know anything about the Furia card beforehand, you wouldn’t know which way round the card was meant to be placed on to the CPU when you came to install the card, as there are no indication or markings on the card itself to help! The correct orientation for the card is the have the heat sinks towards the back of the Amiga (away from you).
To install the card itself, place the mounting socket directly over the top of the CPU and push down slowly and firmly. It is a very tight fit, so you will need to apply a lot of pressure. I found the best way was to apply pressure to the left side of the socket first until the socket is firmly attached, and then apply pressure to right side and then repeat for up and down. If you have installed the card correctly, you should be able to lift the whole Amiga unit off the desk just by holding the Furia card, yes, the socket is that tight.
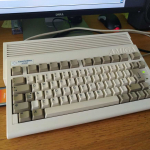
- > My modded Amiga 600
- > The packaging the Furia accelerator card arrived in
- > Installed Furia Accelerator Card in an Amiga 600
- > Birds Eye view of an installed Furia Card in an Amiga 600.
Compact Flash (CF) vs Secure Digital (SD) Cards
I initially had a 4GB Transend compact flash card install on the IDE connector of my Amiga 600 to act as a modern-day hard disk. Many Amiga 600 and 1200 owners do this because small capacity IDE hard disks are no longer available to buy. Also, the added benefit is, the storage cards have a much faster data transfer rates than the mechanical counterparts.
So, once I had installed the card and turned on the Amiga, I was greeted with the classic Amiga boot screen. Not a good sign. So, I insert a bootable Workbench disk and when I got to the Workbench environment, the hard disk icons for the Compact Flash hard disk were missing. It seemed the Furia card could not or did not detect my CF card.
Shit.
This is however a well-known issue with the Furia.
The Furia is very picky, if not, extremely picky when it comes to compatibility with CF and SD cards. Having read various Amiga Forums about this issue, it seems the prefer brand to use for maximum compatibility is SanDisk. For further compatibility, the Furia prefers Secure Digital cards over Compact Flash, faster the better, Class 10 or above. So, my advice, replace your CF adaptor in your Amiga with a SD adaptor.
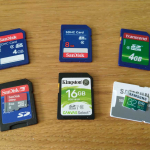
The SD cards I tried were:
- SanDisk 4GB Class 4
- SanDisk 8GB Class 4
- SanDisk 8GB MicroSD, Class 10
- Transend 4GB Class 4
- Kingston 16GB Class 10
- Samsung EVO 32GB USH-1
After numerous trials and lots of frustrations and swear words, I finally picked the Samsung EVO 32GB. In hindsight, I should had bought a compatible CF Card with preinstalled Workbench installed at the time of purchased. It would had been a lot less hassle!
- > The SD Cards I tried with the Furia Accelerator Card
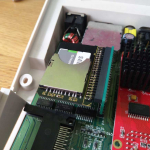
- > SD Card Adaptor for Amiga
Installation of software
So, what was the process I used to ‘test’ the SD cards compatibility? Pretty simple actually: install a full Workbench environment on to the SD card from floppy disk via the Amiga rather than using emulation (Win-UAE). Because I have a full set of Workbench 3.1 on floppy, I decided I wanted to experience the installation process first-hand, like they did back in the 90s. There are numerous videos on YouTube on how to do this (I think I watched nearly all of them at that time), but what is important and what you must take into consideration is, the Amiga wasn’t designed to use Hard Disks bigger than 4GB in capacity.
Because of this, there are special ‘arrangements’ that has to be performed on your SD card to make it usable:
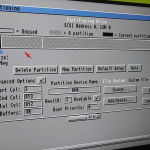
- Partition the SD in to 2GB ‘chunks’ except for the System; I chose: System, Apps and Games. I found if the System partition is around 500MB, this works best. The Apps and Games partition were around 1.8GB each.
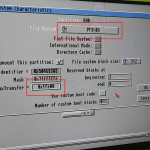
- Format the partitions using the Professional File System III (PFS3) format rather than Amiga’s Fast File System (FFS) and set the Max Transfer setting accordingly for better transfer rates. You need to have the MaxTransfer set to: 0x1Fe00 https://aminet.net/package/disk/misc/pfs3aio
With each SD card I tried, I partition them accordingly and install Workbench; I had mixed results. Some worked, some did not. Those which didn’t work failed mid-installation. The SD cards whereby I was able to do a complete Workbench installation, then proceeded to keep crashing whenever I installed other software from Floppy disk or transferred files from the CF PCMCIA card to the SD card.
At the time, having installed Workbench several times on to various SD cards, I was at my wits end and full of frustration, so I reached out to Twitter and the Amiga community, asking fellow Furia users what brand of SD card they were currently using and for any tips. Thank the Gods, I got replies!
A Twitter user told me they have been using a Samsung EVO 32GB USH-1 SD card with ‘No problems at all’. So, I ordered it, installed it, and this is this the SD card that I am currently using. True to their word, I have not had a problem with it yet.
Another Twitter user, @jbh1977, asked me if I was using the Furia StartUp script to enable the ShadowROM, IDE speed up function and extra memory as this script was giving extra stability to their card. I replied ‘No, but tell me more’.
- > How I partition my SD card using HD Tools
- > Screenshot of the file format used on the SD card and the setting for the MaxTransfer.
Furiatune ?
The Furia card has a software component/extension/driver/AmigaDOS command/Tool which you can download: Furiatune. Again, in hidesight, I should had ordered the Floppy Disk at the time of purchase). Furiatune is an executable command line tool, via the Amiga Shell prompt, whereby you can enable or disable certain functions such as the FPU, CPU cache and so on. This is handy tool as some software and games do not like the FPU enabled for example.
To install it correctly though, the Furiatune ‘driver’ needs to install in the C drawer (folder) on your System drive of the Amiga. But being a complete utter novice to the Amiga file system, I could not find the C drawer until I Googled it and realised it was hidden drawer #Shame. Once I enable Show All Files within Workbench, I installed the extension to the correct place. Phew.
Side note: you will need the Furiatune driver installed to enable the PCMCIA slot on your Amiga 600.
Once installed correctly though, the tool is relatively easy to use if you are comfortable with command line. Open an Executable Command prompt (Right Amiga Key + E) and type:
furiatune ?
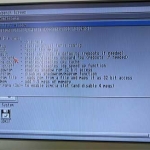
This gives you the commands available for the Furia card.
- > The Furiatune commands available
Furiatune StartUp Script
So, as previous mention, a Twitter user reached out and asked if I was using a script in the Amiga Startup-Sequence file to optimise the Furia. I said I was not and asked what he was referring too.
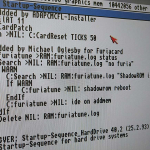
The long and short of it is, if you insert the Furia script (see below) within the Amiga StartUp-Sequence file (which is located in the S drawer), when the Amiga boots up, the script optimises the Furia for use, turning the Furia into one hell of an accelerator.
The script enables the IDE Speed function, puts the 3.1 ROM into memory and adds an additional 1.5MB of RAM. Of course, you could manually activate these features each time you bootup, but this script saves time. So, here is the script:
C:furiatune >RAM:furiatune.log status

C:Search >NIL: RAM:furiatune.log "no furia"

If WARN

C:Search >NIL: RAM:furiatune.log "ShadowROM is active"

If WARN

C:furiatune >NIL: shadowrom reboot

EndIf

C:furiatune >NIL: ide on addmem

EndIf

C:Delete >NIL: RAM:furiatune.log
Credit: @jbh1977 – Read his Blog Post for further details on the script itself.
Even since I have inserted the script in my Startup-Sequence file, I have not encountered a single issue. The Furia, the Amiga and the SD card are working perfectly together, #TouchWood.
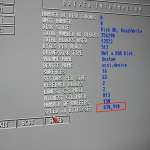
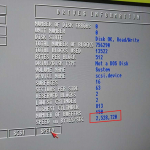
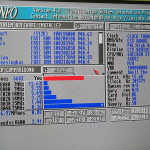
The sheer speed increase from this script is incredible. Using the SysInfo application, I get blazing CPU (already was getting that) and IDE speeds. For example, with IDE disable, the speed I was getting was around 800,000 mark. With the Furia IDE speed enable, I am now getting 2,500,000!
- > The Furia Card Script as it appears in the Startup-Sequence file on the Amiga.
- > IDE Speed of the SD card before the Furia card is optimised.
- > IDE Speed of the SD card after the Furia card is optimised.
- > Screenshot of SysInfo of the Furia Accelerator card on the Amiga 600. Smell the rubber?
Is the Furia worth the cost?
In a word: Yes!
Once you have a working ‘stable’ Furia card, and a SD card full of games ready to be play via WHDLoad, Oh. My. God! Playing 3D games, such as Elite II: Frontier, Driller and flight sims are all silky smooth. But do not worry about 2D games, these all play at the normal FPS.
Also, the sheer speed increase with the Workbench environment is an absolute joy to use. I have not pushed the Furia card to its limits yet, by any means, like playing MP3s or rendering a scene in Lightwave, but it will be an exciting journey to find out.
In Summary
- If you can afford it, purchase the Furiatune floppy and compatible CF Card with preinstalled Workbench; save yourself a nightmare
- If want to go it alone, then use a SD card rather than a CF card. Get a Samsung EVO 32GB USH-1 SD card if you can
- Partition your System drive to around 500MB, all other partitions no more than 2GB
- Format your partitions in the PFS3 format, pay special attention to the MaxTransfer setting
- Add the Furia Script to the Startup-Sequence script to optimise the Furia.
Thank you for reading.

